GM TPMS: The Setup And Relearn Procedures
July 15, 2018
View All Our Tire and Wheel Courses
GM TPMS systems on Buick, Pontiac, Chevy, GMC, Cadillac and Hummer models are some of the easiest to service if you have the right tools and knowledge. Starting in 2007, most vehicles use a TRW-, Schrader- or VDO-manufactured system that all share the same relearn procedures and behaviors, with only a few exceptions (like the Pontiac Vibe).
Shops should use a TPMS tool to reset the sensor positions after rotation. There is a method in the owner’s manual to “match” the sensors that involves deflating a tire for eight seconds.
To see if a code has been set on vehicles with or without a driver information center (DIC), turn the key on without starting the engine, and the TPMS light will blink for one minute and then stay on with a Service Tire Monitor System message. If that occurs, a TPMS system problem exists. On vehicles equipped with a DIC, a SERVICE TIRE MONITOR type message will also display. When the road tire is repaired and reinstalled in the original location, the TPMS indicator icon illumination and DIC message may remain displayed until the DTC is resolved and cleared.
The initial “low tire” light is similar to the “low fuel” indicator and adding air to the low tire will extinguish the light. If the driver re-inflates the low tire, they must drive a short distance for at least 30 seconds before the sensors recognize the increase in pressure and turn the light off again. If the deflation is rapid, it will give a more immediate signal by flashing a warning light.
A GM TPMS has pressure, temperature and acceleration sensors. The unit also has a radio transmitter, receiver and battery. Sensors have an estimated 10 year/150,000 mile battery life (GM’s estimate). The antenna and receiver are the same as those used for the keyless-entry system. The antenna is typically sandwiched between the layers of glass in the front or rear glass, but some vehicles have a dedicated antenna mounted in various places.
The keyless-entry module communicates with the TPMS sensors and relays the information with the Body Control Module (BCM) on the CAN BUS. If the keyless-entry module or BCM is replaced, the sensors must be relearned. Same goes for the key fobs.
Each sensor has its own unique ID number. If a new sensor is fitted, the BCM must be reprogrammed with its unique ID and its position on the vehicle.
Each sensor takes a pressure measurement sample once every 30 seconds while in stationary mode. If the tire pressure increases or decreases by more than 1.2 psi from the last pressure measurement, another measurement will occur immediately to verify the change in pressure. If a pressure change has indeed occurred, the sensor transmits in learn mode.
Each sensor has an internal low frequency coil, and when the TPMS tool is used in activate mode, it produces a low frequency transmission that activates the sensor. The sensor responds to a low frequency activation by transmitting in learn mode. When the TPMS antenna receives a learn mode transmission while in TPMS learn mode, it will assign that sensor’s ID number to the location on the vehicle relative to the order in which it was learned.
Relearn Tips
• It is best to perform the TPMS relearn procedure in the parking lot away from the shop. This decreases the chances of other radio signals interfering with the relearn process.
• Aim at the sidewall below the valve stem — not at the stem.
• If you cannot get a sensor to initialize, try pushing the vehicle forward a foot or two. The signals can be blocked by components like rotors, calipers and knuckles, so repositioning the vehicle may unblock the sensor. This is far more common on the front wheels.
TPMS Sensor Matching
1. Set the parking brake.
2. Turn the ignition switch to ON/RUN with the engine off.
3. Press and hold the keyless-entry fob transmitter’s LOCK and UNLOCK buttons, at the same time, for about five seconds to start the TPMS learn mode. The horn sounds twice indicating the TPMS receiver is ready and in learn mode. This can also be performed using the turn signal arm and the driver information center.
4. Starting with the left-front tire, activate the sensor by holding the TPMS tool aimed upward against the tire sidewall close to the wheel rim at the valve stem location. Press and release the activate button and wait for a horn chirp.
5. Once the horn chirp has sounded, the sensor information is learned and a turn signal will illuminate in the next location to be learned. On most models, the driver-side-front will be next. Once the learn mode has been enabled, each of the sensors’ unique identification codes can be learned.
6. When a sensor ID has been learned, the module sends a serial data message to the BCM to sound a horn chirp. This verifies the sensor has transmitted its ID and has received and learned it. The module must learn the sensor IDs in the proper sequence to determine each sensor’s location. The first learned ID is assigned to the left-front location, the second to right-front, the third to right-rear and the fourth to left-rear.
The learn mode will cancel if the ignition is cycled to OFF or if more than two minutes has elapsed and no sensor has been learned. If the learn mode is canceled before the first sensor is learned, the original sensor IDs will be maintained. If the learn mode is canceled after the first sensor is learned, the following will occur:
• All stored sensor IDs will be invalidated in the RCDLR memory.
• If equipped, the DIC will display dashes instead of tire pressures.
• DTC C0775 will be set.
These conditions will now require the learn procedure to be repeated for the system to function properly.
Top GM TPMS Tips
• If the BCM or keyless-entry modules have been replaced, the modules must be reprogramed and the sensors relearned.
• Many of these systems have been on the road for nine years, so be prepared to deal with mixed sets of sensors from different manufacturers.
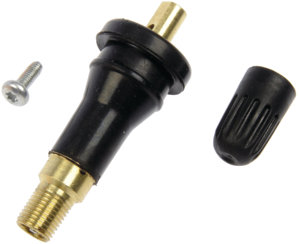
• If the model has snap-in sensors, before installing the valve stem, it is acceptable to lubricate the seating surfaces with an approved tire lubricant. Do not use chassis grease or a grease with petroleum distillates. These types of lubricants can degrade the stem over time and cause a leak. Lubricating the stem can help in the alignment of the sensor on the flats.
• If you encounter a sensor that does not respond when activated by the tool, try activating another sensor that responded previously. This will help you determine if the tool is able to activate the sensor or if you have a problem with one particular sensor.
• When tightening the screw of a snap-in sensor, be mindful of stress on the sensor and the alignment of the sensor. Start the screw for the first couple of threads and make sure the sensor and stem are aligned. When performing the final tightening sequence, stop when the tool clicks to indicate the proper torque has been reached.
• Sensors are getting to be very inexpensive. If one sensor dies, consider replacing all of them.
TPMS CHEVROLET CRUZE RELEARN

Each TPMS sensor has a unique identification code. The identification code needs to be matched to a new tire/wheel position after rotating the tires or replacing one or more of the TPMS sensors.
The TPMS sensor matching process should also be performed after replacing a spare tire with a road tire containing the TPMS sensor. The malfunction light and the DIC message should go off at the next ignition cycle. The sensors are matched to the tire/wheel positions, using a TPMS relearn tool, in the following order: driver side front tire, passenger side front tire, passenger side rear tire, and driver side rear.
There are two minutes to match the first tire/wheel position, and five minutes overall to matchall four tire/wheel positions. If it takes longer, the matching process stops and must be restarted.
The TPMS sensor matching process is:
- Set the parking brake.
- Turn the ignition to ON/RUN with the engine off.
- Use the MENU button to select the Vehicle Information menu in the Driver Information Center (DIC).
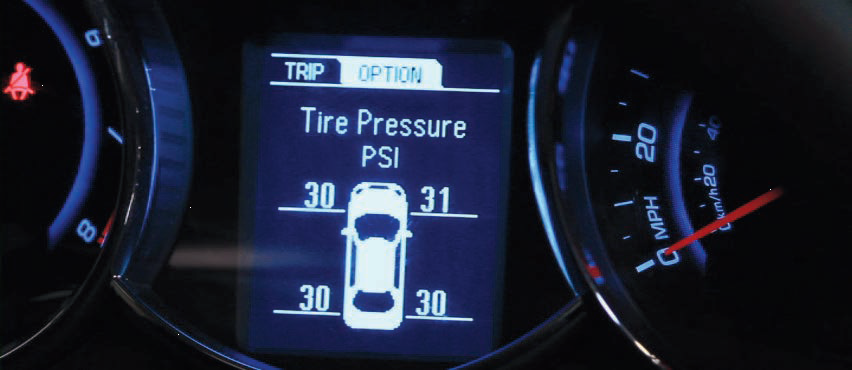
- Use the thumbwheel to scroll to the Tire Pressure Menu item screen.
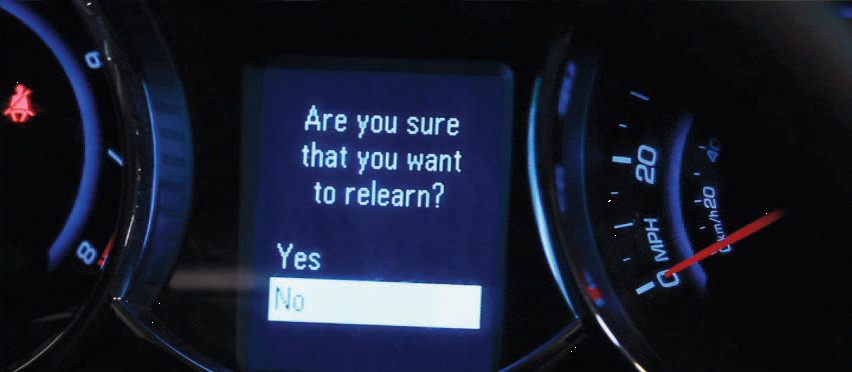
- Press the SET/CLR button to begin the sensor matching process. A message requesting
acceptance of the process should display.
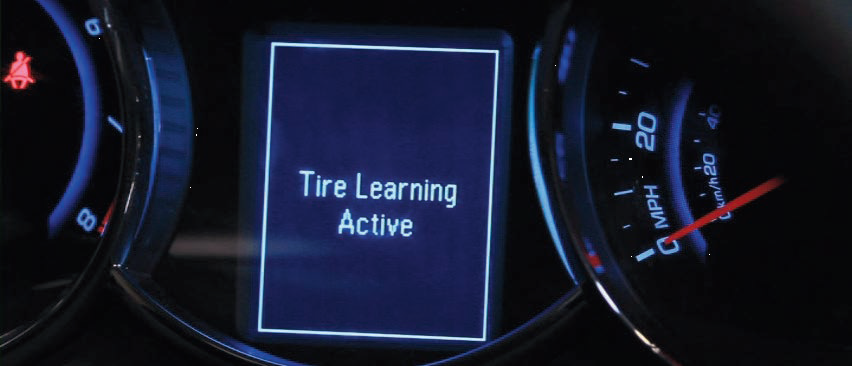
- Press the SET/CLR button again to confirm the selection. The horn sounds twice to signal
the receiver is in relearn mode and the TIRE LEARNING ACTIVE message displays on the
DIC screen.
- Start with the driver side front tire.
- Place the relearn tool against the tire sidewall, near the valve stem. Then press the button
to activate the TPMS sensor. A horn chirp confirms that the sensor identification code has
been matched to this tire and wheel position. - Proceed to the passenger side front tire, and repeat the procedure in Step 8.
- Proceed to the passenger side rear tire, and repeat the procedure in Step 8.
- Proceed to the driver side rear tire, and repeat the procedure in Step 8. The horn sounds
two times to indicate the sensor identification code has been matched to the driver side rear
tire, and the TPMS sensor matching process is no longer active. The TIRE LEARNING
ACTIVE message on the DIC display screen goes off. - Turn the ignition to LOCK/OFF.
- Set all four tires to the recommended air pressure level as indicated on the Tire and
Loading Information label.
Join the AVI Mailing List!
Sign Up Now
Related Course

Making Money Servicing TPMS with Karl Schneider
View CourseThis course, presented by Karl Schneider, covers everything you need to know about TPMS. Karl covers the shop’s legal responsibilities that come with TPMS and how to avoid expensive ramifications. He goes over the three types of sensors you will encounter, how to diagnose and service these types. As a wrap-up, Karl conducts some hands-on case studies that will have you feeling confident in your knowledge of properly servicing TPMS.


